Category Archives: Reviews and Rants

Mac OSX on X86 – Switching to the Dark Side

I never knew this day would come.

As of today, I have officially switched over my main operating system to OSX (Leopard 10.5.4). On a standard PC, that is.

This is a shock to many of my friends, whom would never see me switch over to an Apple product. As much I have surprised myself, it’s true, and I have one thing to say: I love OSX.

About two weeks ago, I simply had enough of my Windows XP machine. While I never had any major problems with it (just one I never got to solve) I was simply bored from using it. Okay, so it’s not the main reason, but it was definitely one of them. There were a few applications that were Mac-only, such as modul8, that enticed me to switch over (playing with the demo now). Another reason was to run my web design programs on a stable machine, allowing me to concentrate on my work rather than worry about the resources on hand. Plus, I needed an operating system that could handle my multitasking abilities (such as 50+ Firefox tabs, Dreamweaver, Photoshop, Messenger, etc. all open). I didn’t want to switch over to Linux, so OSX was the next viable choice. However, I didn’t want to purchase expensive Apple hardware, especially since the components they use are now ones from a standard x86 personal computer. So this is where the OSX86 Project came in to save the day.

What is the OSX86 Project

It’s very simple to explain what the OSX86 Project is and what it does. First, a bit of history.

A while ago, Apple switched over to Intel processors from IBM’s PowerPC chips. This resulted in a massive shift to PC-based hardware, as redesigning everything to be Mac-only would be utterly expensive. Now that Apple switched hardware, they recompiled OSX to be x86-ready. The new Mac era begins. OSX starts gaining popularity as a very secure and stable operating system. A lot of people start switching over to Macs, as they have become less expensive (still pricey, though).

This is where a group emerges, hoping to have an alternative to XP/Vista on the desktop after hearing about OSX so much. Since you can’t just install OSX on a regular PC, they begin hacking away at the OSX kernel (the core) in hopes of finding a way to circumvent the security measures placed by Apple during the setup routines. Basically, what makes a Mac a Mac is a simple chip on the motherboard that says “I’m a Mac, trust me”. If you figure out a way to bypass or spoof this chip, you’ve got yourself a Mac. It seems that finding a workaround was quite easy (and too technical to explain on this blog). Basically, from the wiki:

The “Trusted Platform Module,” or TPM, is a computer chip embedded inside Intel-based Macs to prevent the Intel-based version of Mac OS X from running on non-Apple hardware. During installation of Mac OS X, Mac OS X interfaces with the TPM. If Mac OS X finds that the TPM doesn’t exist, Mac OS X refuses to install or run.

Today, the OSX86 group has come such a long way (thanks to a multitude of individuals on their forums) that running Mac OSX is extremely simple and native. What I mean by native is that you don’t need to do anything complex to get the operating system running on your desktop. Once you have it installed, you can actually do software updates inside OSX and not worry about anything breaking. The kernel is vanilla and unmodified.

How I Switched Over to OSX from XP

Basically, the first step was to make sure all my existing applications were available on OSX. Sure enough, Dreamweaver or more importantly Adobe’s entire product line, were ported to OSX decades ago. A few of the games I am playing were also available on OSX, but I decided to keep an XP partition just for games whenever the urge came up. Lastly, I had to make sure my hardware was compatible with Leopard and that all drivers were readily available.

For those interested, here are my current computer specifications. The following is 100% compatible with Leopard 10.5.4.

  • Motherboard: Asus P5K-VM, with 4GB of DDR2-800 RAM from OCZ, onboard Realtek ALC883 HD audio
  • Processor: Intel Core 2 Duo E4600 2.4GHZ 800MHZ FSB
  • Video card: BFG Tech Geforce 8800GT OC 512MB
  • Hard drives: 2x Seagate 500 GB SATA2 7200 RPM

Installation of Leopard was easy, thanks to Kalyway’s installation media (available everywhere if you know where to look). However, before I installed the operating system, I had to partition my current hard drive into two. I basically decided to dedicate 120 GB to OSX (temporarly) and I did this using Partition Magic 8.0 on XP. Once I successfully partitioned the drive, I installed Kalyway’s Leopard OSX 10.5.4 using this guide. Everything was straight-forward and simple.

Once I booted into OSX the first time, a few things didn’t work out of the box as I had hoped. I had install the nVidia drivers manually, along with the sound card. The ethernet card worked out of the box, which was a huge bonus (as it allowed me to find solutions for the rest of my non-working hardware on the net). My Creative Audigy is sadly not compatible with OSX, but my onboard ALC883 is (and it’s just as good for my music listening habits). If you have an Asus P5K-VM motherboard, check out this thread for a great write-up on how to fix everything up.

All I can say in this review is that OSX flies with my hardware. Everything is super smooth, fast and stable. I have this warm fuzzy feeling inside now, and I look forward to going home to play with my new operating system. It also feels good to know that the architecture is the BSD kernel, which is damn secure. I love knowing the fact that spyware, adware, viruses or any type of malware won’t be on my system anytime in the future (unless of course, malware writers target OSX…).

This is my review for today. I’ll have a more detailed write-up in a month or two after I use it extensively with my work. So far so good!
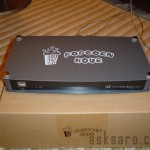
Popcorn Hour A-100 Review

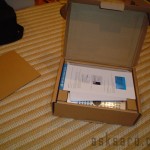
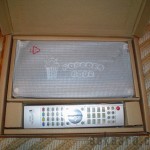
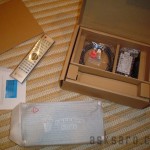
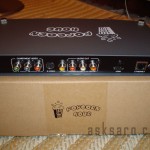
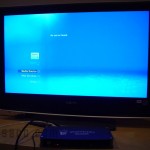
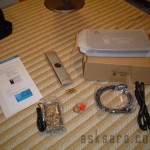
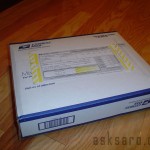
Much to my surprise, my Popcorn Hour A-100 came in the mail yesterday after only waiting one week. I ended up paying import fees, roughly 35$ more, but didn’t mind it so much as comparable units would cost double, if not triple the amount. It took about a month for the whole unit to arrive on my doorstep, from ordering process to unpacking it. Here’s a short review on this little device.

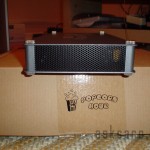
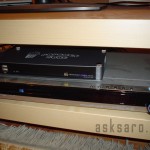
Design – sleek and small, it’s incredible how Syabas has managed to cram so much into so little. I’m able to fit this device among my other A/V hardware with ease. Right now, it’s stacked on top of my DVD player taking up next to nothing in terms of space.

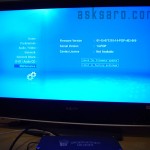
User Interface – I would say one of the most important parts of any consumer device, this puppy is easy to use and it’s very responsive with the provided remote control. The GUI resembles that of Microsoft’s Media Center application (in terms of icons and colours) and that’s not a bad thing either. The whole interface is sleek and smooth, adding class to the device.

Playback – Simply, it plays anything I can throw at it. I started off directly with with some 720p and 1080p Matroska (MKV) files and it didn’t even stutter: the Popcorn Hour A-100 played them beautifully in high definition along with the multi-surround AC3 sound channels. The only problem the A-100 has with these types of files is the fast-forwarding, but I don’t think it’s the device’s fault (I’m pretty sure it’s something to do with MKV files and indexes). Regardless, I also played some WMVs and AVIs (XviD) perfectly over the network. I didn’t try playing any audio files though, but I’m sure the A-100 will do a fine job.

Value – When I first heard about the A-100, I thought it would cost somewhere near 300 to 400$. When I found out it was only 179.00$ USD, my jaw dropped. “There must be a catch” I thought. But doing a quick search on Google resulted in many high praises for the units and people with working units. Without hesitating, I ordered a unit right away. Comparing the A-100 to the likes of the other media players on the market, this is the cheapest and most powerful unit out there. Previously, to playback 1080p video, I built myself a basic low-end computer that cost me 434$. That’s roughly 200$ more than Syabas’ unit, at a fraction of the size of a desktop computer. I wish I knew about this puppy long-before I built myself a new computer to do high definition video playback.

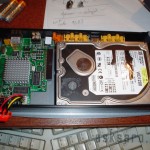
So far, I have no complaints about this unit. I installed a temporary 120GB hard drive into it but didn’t have time to test it out. I’ll have a follow-up guide/review once I settle in with this new media player.

HalfAgain’s StoreStacker Review

I have been playing with StoreStacker since I purchased it and here’s my take on it.

This software definitely has a place among people running niche websites. For those who need a system that can show the reader a select broad range of products from a distributor, StoreStacker accomplishes the job easily. It lets you run your own affiliate store, by pulling relevant products from Amazon, eBay & Clickbank and including your affiliate id/code in the product URLs. Supposedly, plug-ins will be developed to handle other affiliate links, such as from Linkshare, CJ and Overstock. Speaking of links, the ones that the software creates for you are nicely masked from visitors and search engines

You can create your own templates too (based on the Smarty template engine I believe) to give your stores a unique look (or model it around your existing site’s layout). Out of the box, StoreStacker comes with 3 basic professional-looking templates to get you started. Of course, I highly recommend everyone to change the templates right away as to not face any search engine duplicate content penalties. Oh, you can also include your own advertising codes in the templates and/or directly into Storestacker, such as Google Adsense for some extra income.

The system is fast and very well coded. The product grabbing system is never slow and works like a charm. The guy who coded StoreStacker knows his programming well.

I have used BlogSolution on a few domains liked how the system ran. StoreStacker is no different: the user interface is clean, straight-forward and easy to use. I can create new categories and grab products using keywords of my choice in the matter of a minute, filling my site with products ready to sell. If you have a dozen or more categories to create, StoreStacker supports XML-based import files for quick and efficient category creation. It’s way too easy.

For 97.00$ USD, StoreStacker is a steal and a half. I recommend it to anyone wanting to expand their affiliate store and offer their visitors some new products, without manually entering each and every product from their various sources. If you want to receive 20% off this system or any other HalfAgain product, just use the promo code LUCKYYOU1068400 when you checkout. Give it to your friends too if you want them to receive a discount!

StoreStacker Officially Released

It looks like StoreStacker has been officially released by the HalfAgain team as promised (there were delays before, so this is good news for them to release on time). If you don’t know what StoreStacker is, take a look at this post I made a few days ago. In a nutshell, this baby will be able to pull multiple feeds (Amazon, Linkshare, Clickbank, eBay, etc) and display product information and prices straight on your website. Why would you want to do this? Simply, you get to give the consumer an option when it comes to purchasing, as some stores offer products for much cheaper. Rather than manually enter every item on your site, StoreStacker simplifies things by automating these tasks. This makes your site a one-stop shopping resource for everything about the niche you’re targeting.

Here are a few things about StoreStacker that you should know about before purchasing. First, the license is for unlimited domains: that means you get to install the software on as many websites as you like with no restrictions. Second, you can also list your own products side-by-side to the ones from the affiliate feeds. Third, if you are one of the first 500 purchasers of this script, you are entitled to a free Clickbank feed plugin. Fourth, you can add your own products to the shop next to the affiliate ones. Last thing you should know is that supposedly, the software will be limited to only 1000 customers, but I don’t think that’s true. HalfAgain has a reputation for these types of claims (see ContentClub). In any case, if this restriction is true, it’s something to consider.

For anyone who wants 20% off the purchase of StoreStacker, use this promo code: LUCKYYOU1068400. Pass it to your friends too if you want them to have a discounted price! This promo code is good for any Halfagain product, such as BlogSolution, ContentClub, ContentSolution, RSS Magician, RSS Evolution and of course, StoreStacker.

I just purchased my own copy of SS, so I will soon do a full review of the software and let everyone know how it is very soon. Stay tuned.

Powertec Power Rack System Review – Final Thoughts

It has been exactly a month since I last spoke about the Powertec Power Rack System, so it’s time for a quick final take on it. I have been training with it exclusively and love it to death. The whole thing is very sold, and I bumped into it a few times with the plates and bars… not a scratch has surfaced. I haven’t been able to use the lat attachments yet because of the low ceiling height, but I should have a summary of it in two or three months (when I move my setup to the garage). I have been squatting, benching (flat and incline), dead-lifting and power-cleaning for a month and I have no complaints whatsoever. The bench is sturdy and highly adjustable, and it hasn’t failed on me yet. I have done a few dips with the power rack and the thing doesn’t budge with my weight (all 180 lbs of me :)). Yep, this thing is strong and durable, and I’m confident it’s going to last me a long, long time. Since I got it, I have always looked forward to going home and lifting some weights. Damn fine rack.