Category Archives: Technology

Fix Apple OSX 10.5.5 Update Problems

For anyone who screwed up the 10.5.5 update (either via Software Update or forgot to remove the AppleIntelCPUPowerManagement.kext) don’t fret. You can remove the problematic extension by booting off your OSX installation media (in my case, Kalyway 10.5.2) and using the Terminal console (under Utilities). This will drop you directly onto the root drive of OSX and allow you to do some modifications.

The next step is to find where your OSX is installed and modify whatever is needed. In my case, it was /Volumes/OSX/. Your volume name may differ. You can figure out what it is by typing “df” at the console and get a list of hard drives with their mount points.

Type in the following (by substituting <OSX> with your volume’s name):

# rm -rf /Volumes/<OSX>/System/Library/Extensions/AppleIntelCPUPowerManagement.kext

Next step is to repair the drive’s permissions. Quit the Terminal console entirely, and go to Disk Utility under Utilities. From there, find your OSX drive and click on “Repair Disk Permissions”. It’ll take a few minutes. Once the repair is complete, time to reboot.

At the boot prompt, type in the following: “-x -v -f”

After a few minutes, OSX should start up in Safe Boot and allow you to login. In my attempt, the desktop and top bar did not appear. Launching any available application in the dock started up the top bar in my case, so I was able to use Spotlight and launch Terminal. Now, we’re going to redo the 10.5.5 update. Hopefully you saved it somewhere reachable, such as your desktop.

First, let’s start by running the following command in a Terminal window:

# while sleep 1 ; do rm -rf /System/Library/Extensions/AppleIntelCPUPowerManagement.kext ; done

While this is running in the background, let’s go ahead and launch the Disk Utility. Now, we’re going to mount the MacOSXUpd10.5.5.dmg (or the Combo or Delta update file). Go to File -> Open and find your .dmg file. It should successfully mount it.

Next step is to launch another Terminal window. This time, we’re going to start the 10.5.5 update package. In the console, type:

# cd /Volumes/Mac\ OS \X 10.5.5\ Update/
(HINT: or type “cd /Volumes/Mac <tab key> for it to autocomplete).

You should be in the mounted .DMG file’s contents. You can go ahead and type:

# open MacOSXUpd10.5.5.pkg

The 10.5.5 update application should begin. Within moments, you’ll notice your desktop reappear and everything seem like it’s back to normal. Once the installation is finished, [b]don’t reboot[/b]! We still have one more step to do.

Go to the Terminal window where we had the “while sleep 1…” command running (it was deleting the AppleIntelCPUPowerManagement.kext for us). Press CTRL + C to terminate the command. Using this window, it’s time to go to the InstallAtStartup directory and do a minor modification. Type:

# pico /System/InstallAtStartup/scripts/1

Look for the following string: “/System/Library/Extensions/Dont Steal Mac OS X.kext”

If you find it, rename it to: “/System/Library/Extensions/dsmos.kext”

If you cannot find it, don’t worry. I didn’t find it in my file, so it’s not mandatory. I added this step for precautionary reasons.

At this point, you can go ahead and modify or reinstall any .kexts your system needs. If you aren’t sure what to do in this step, cross your fingers.

Ok, time to reboot. Once OSX starts to load, you’ll notice that it reboots right away after showing a black screen. Don’t panic, this is normal. Your computer will restart once again. OSX should finally load at this point, and everything should be back to normal.

Tested on:
Kalyway 10.5.2 (base) -> 10.5.3 (Kalyway update) -> 10.5.4 (Software Update)
Asus P5K-VM, BFGTech 8800 GT OC

P5K-VM users will need to reinstall audio drivers after the 10.5.5 update.

Thanks to netkas.org. I hope this guide helps someone out. 🙂

This is for anyone who is getting the “No HPETs available” during OSX bootup.
Mac OSX on X86 – Switching to the Dark Side

I never knew this day would come.

As of today, I have officially switched over my main operating system to OSX (Leopard 10.5.4). On a standard PC, that is.

This is a shock to many of my friends, whom would never see me switch over to an Apple product. As much I have surprised myself, it’s true, and I have one thing to say: I love OSX.

About two weeks ago, I simply had enough of my Windows XP machine. While I never had any major problems with it (just one I never got to solve) I was simply bored from using it. Okay, so it’s not the main reason, but it was definitely one of them. There were a few applications that were Mac-only, such as modul8, that enticed me to switch over (playing with the demo now). Another reason was to run my web design programs on a stable machine, allowing me to concentrate on my work rather than worry about the resources on hand. Plus, I needed an operating system that could handle my multitasking abilities (such as 50+ Firefox tabs, Dreamweaver, Photoshop, Messenger, etc. all open). I didn’t want to switch over to Linux, so OSX was the next viable choice. However, I didn’t want to purchase expensive Apple hardware, especially since the components they use are now ones from a standard x86 personal computer. So this is where the OSX86 Project came in to save the day.

What is the OSX86 Project

It’s very simple to explain what the OSX86 Project is and what it does. First, a bit of history.

A while ago, Apple switched over to Intel processors from IBM’s PowerPC chips. This resulted in a massive shift to PC-based hardware, as redesigning everything to be Mac-only would be utterly expensive. Now that Apple switched hardware, they recompiled OSX to be x86-ready. The new Mac era begins. OSX starts gaining popularity as a very secure and stable operating system. A lot of people start switching over to Macs, as they have become less expensive (still pricey, though).

This is where a group emerges, hoping to have an alternative to XP/Vista on the desktop after hearing about OSX so much. Since you can’t just install OSX on a regular PC, they begin hacking away at the OSX kernel (the core) in hopes of finding a way to circumvent the security measures placed by Apple during the setup routines. Basically, what makes a Mac a Mac is a simple chip on the motherboard that says “I’m a Mac, trust me”. If you figure out a way to bypass or spoof this chip, you’ve got yourself a Mac. It seems that finding a workaround was quite easy (and too technical to explain on this blog). Basically, from the wiki:

The “Trusted Platform Module,” or TPM, is a computer chip embedded inside Intel-based Macs to prevent the Intel-based version of Mac OS X from running on non-Apple hardware. During installation of Mac OS X, Mac OS X interfaces with the TPM. If Mac OS X finds that the TPM doesn’t exist, Mac OS X refuses to install or run.

Today, the OSX86 group has come such a long way (thanks to a multitude of individuals on their forums) that running Mac OSX is extremely simple and native. What I mean by native is that you don’t need to do anything complex to get the operating system running on your desktop. Once you have it installed, you can actually do software updates inside OSX and not worry about anything breaking. The kernel is vanilla and unmodified.

How I Switched Over to OSX from XP

Basically, the first step was to make sure all my existing applications were available on OSX. Sure enough, Dreamweaver or more importantly Adobe’s entire product line, were ported to OSX decades ago. A few of the games I am playing were also available on OSX, but I decided to keep an XP partition just for games whenever the urge came up. Lastly, I had to make sure my hardware was compatible with Leopard and that all drivers were readily available.

For those interested, here are my current computer specifications. The following is 100% compatible with Leopard 10.5.4.

  • Motherboard: Asus P5K-VM, with 4GB of DDR2-800 RAM from OCZ, onboard Realtek ALC883 HD audio
  • Processor: Intel Core 2 Duo E4600 2.4GHZ 800MHZ FSB
  • Video card: BFG Tech Geforce 8800GT OC 512MB
  • Hard drives: 2x Seagate 500 GB SATA2 7200 RPM

Installation of Leopard was easy, thanks to Kalyway’s installation media (available everywhere if you know where to look). However, before I installed the operating system, I had to partition my current hard drive into two. I basically decided to dedicate 120 GB to OSX (temporarly) and I did this using Partition Magic 8.0 on XP. Once I successfully partitioned the drive, I installed Kalyway’s Leopard OSX 10.5.4 using this guide. Everything was straight-forward and simple.

Once I booted into OSX the first time, a few things didn’t work out of the box as I had hoped. I had install the nVidia drivers manually, along with the sound card. The ethernet card worked out of the box, which was a huge bonus (as it allowed me to find solutions for the rest of my non-working hardware on the net). My Creative Audigy is sadly not compatible with OSX, but my onboard ALC883 is (and it’s just as good for my music listening habits). If you have an Asus P5K-VM motherboard, check out this thread for a great write-up on how to fix everything up.

All I can say in this review is that OSX flies with my hardware. Everything is super smooth, fast and stable. I have this warm fuzzy feeling inside now, and I look forward to going home to play with my new operating system. It also feels good to know that the architecture is the BSD kernel, which is damn secure. I love knowing the fact that spyware, adware, viruses or any type of malware won’t be on my system anytime in the future (unless of course, malware writers target OSX…).

This is my review for today. I’ll have a more detailed write-up in a month or two after I use it extensively with my work. So far so good!

Popcorn Hour A-100 Review

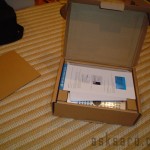
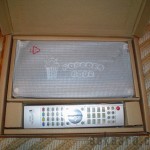
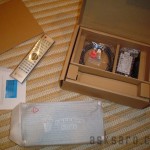
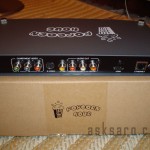
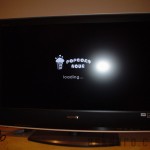
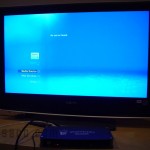
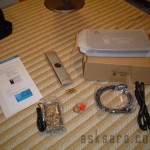
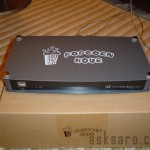
Much to my surprise, my Popcorn Hour A-100 came in the mail yesterday after only waiting one week. I ended up paying import fees, roughly 35$ more, but didn’t mind it so much as comparable units would cost double, if not triple the amount. It took about a month for the whole unit to arrive on my doorstep, from ordering process to unpacking it. Here’s a short review on this little device.

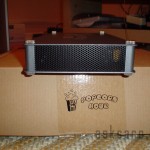
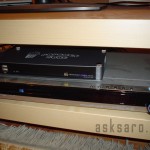
Design – sleek and small, it’s incredible how Syabas has managed to cram so much into so little. I’m able to fit this device among my other A/V hardware with ease. Right now, it’s stacked on top of my DVD player taking up next to nothing in terms of space.

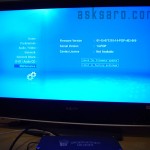
User Interface – I would say one of the most important parts of any consumer device, this puppy is easy to use and it’s very responsive with the provided remote control. The GUI resembles that of Microsoft’s Media Center application (in terms of icons and colours) and that’s not a bad thing either. The whole interface is sleek and smooth, adding class to the device.

Playback – Simply, it plays anything I can throw at it. I started off directly with with some 720p and 1080p Matroska (MKV) files and it didn’t even stutter: the Popcorn Hour A-100 played them beautifully in high definition along with the multi-surround AC3 sound channels. The only problem the A-100 has with these types of files is the fast-forwarding, but I don’t think it’s the device’s fault (I’m pretty sure it’s something to do with MKV files and indexes). Regardless, I also played some WMVs and AVIs (XviD) perfectly over the network. I didn’t try playing any audio files though, but I’m sure the A-100 will do a fine job.

Value – When I first heard about the A-100, I thought it would cost somewhere near 300 to 400$. When I found out it was only 179.00$ USD, my jaw dropped. “There must be a catch” I thought. But doing a quick search on Google resulted in many high praises for the units and people with working units. Without hesitating, I ordered a unit right away. Comparing the A-100 to the likes of the other media players on the market, this is the cheapest and most powerful unit out there. Previously, to playback 1080p video, I built myself a basic low-end computer that cost me 434$. That’s roughly 200$ more than Syabas’ unit, at a fraction of the size of a desktop computer. I wish I knew about this puppy long-before I built myself a new computer to do high definition video playback.

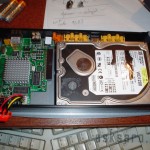
So far, I have no complaints about this unit. I installed a temporary 120GB hard drive into it but didn’t have time to test it out. I’ll have a follow-up guide/review once I settle in with this new media player.

Sony Ericsson XPERIA X1 White Paper Details

he XPERIA X1 phone is not out yet, but a white paper was released touting all the cool new features of the device last month. Just by skimming over the document briefly, this phone looks jam-packed with all sorts of goodies. I have a feeling that the iPhone will soon be getting its ass kicked when the X1 is out. Apple should definitely rework the new 3G version of its phone if they want to stay head of the game!

The X1 has these buttons referred to as “panels” on the main home screen (they’re clickable shortcuts pretty much). Some of the pre-loaded panels are news updates, finance, weather info and shortcuts to applications found on the phone. There’s also the Media Experience Panel which is probably a multimedia (audio/video) playing application. A Slideshow Panel is included for viewing your pictures and videos in an organized manner. The Today Panel is like any Window Mobile-based PDA’s today screen. There’s also a 3D Fish Panel that is a screensaver for eye-candy purposes, something which I’ve seen on the iPhone (since, you know, having fish swim around in your phone is really cool).

The long list of features found on the XPERIA X1 include:
• 3-inch Wide-VGA (WVGA) (800×480) TFT 65K colour LCD
• XPERIA™ panel concept
• Unified Media Experience
• 3.2-megapixel AF camera with touch focus
• Video capture and playback upto 30 fps
• Integrated WiFi
• Integrated A-GPS
• Handsfree headset with a 3.5 mm audio jack, USB charger, USB cable provided in the kit.
• Internet Explorer Mobile browser
• HSDPA 7.2Mbps, HSUPA 2Mbps
• YouTube support (3GPP playback)
• FM radio, streaming audio/video
• Video telephony
• Bluetooth™ 2.0
• HW 3D Graphics
• Supports microSD™ High Capacity memory card
• Exchange /IMAP/POP3 email
• Special effects (Illumination, animation, transitions)
• Quad-band EDGE (850/900/1800/1900 MHz)
• Upto Tri-band HSPA (850/1900/2100 MHz) (900/1900/2100 MHz)

I seriously can’t wait for this phone!

Popcorn Hour A-100 Shipped

I just got an email this morning that my Popcorn Hour A-100 (ordered last month) has finally been shipped by Syabas. It’s coming all the way from California! Most likely it’ll take four or five days for it to get here, max 1 week. For those who don’t know what this is, it’s a device that can play multimedia files of all kind, such as H.264, XviD, MPEG2 & 4, VC-1, MP3s and more. It even does Matroska (.MKV) files and 1080p playback. It’s featured with a Windows Media Center look-alike user interface for easy navigation, and it’s all packed into a small portable unit. HDMI, RCA, Coaxial, Component and S-Video connections are included. I have been on a waiting list for almost a month and it’s good to see them delivering ahead of schedule. You need to sign up on a first-come, first-serve basis list to actually get one of these babies. I will review this unit as soon as mine gets here!